Annapurna Circuit Photography Guide
The Annapurna Circuit is widely considered one of the most breathtaking long-distance treks in the world. Over the course of two to three weeks, it winds through a dramatic range of landscapes — from hot and humid jungles and terraced fields to barren high-altitude plateaus and snowy mountain passes. It’s a photographer’s paradise, full of rich cultural encounters, changing light, and dramatic mountain scenery.
This post isn’t meant to describe all the logistics or detailed planning required for the Annapurna Circuit. Instead, it’s a photography-focused guide designed to help you anticipate the kind of scenery you’ll encounter at different points of the trail and to highlight the best locations for capturing stunning images.
Bhulbhule: Where It All Begins (or not?)
The trek begins at Bhulbhule, which lies just past Besisahar. Both towns can be reached by bus from either Kathmandu or Pokhara. While recent trends see many trekkers bypassing this section altogether by hopping on jeeps straight to Chame or even Manang, I believe that’s a missed opportunity.
The Annapurna Circuit reveals its wonders from the very first steps. While you won’t immediately be surrounded by towering snow-covered peaks, walking the trail from Bhulbhule allows you to experience the gradual and magical transition of the terrain — from the lush subtropical forests and rice fields around Besisahar to the stark, high-altitude deserts of Mustang. That transformation is best appreciated on foot. And, with your camera ready!
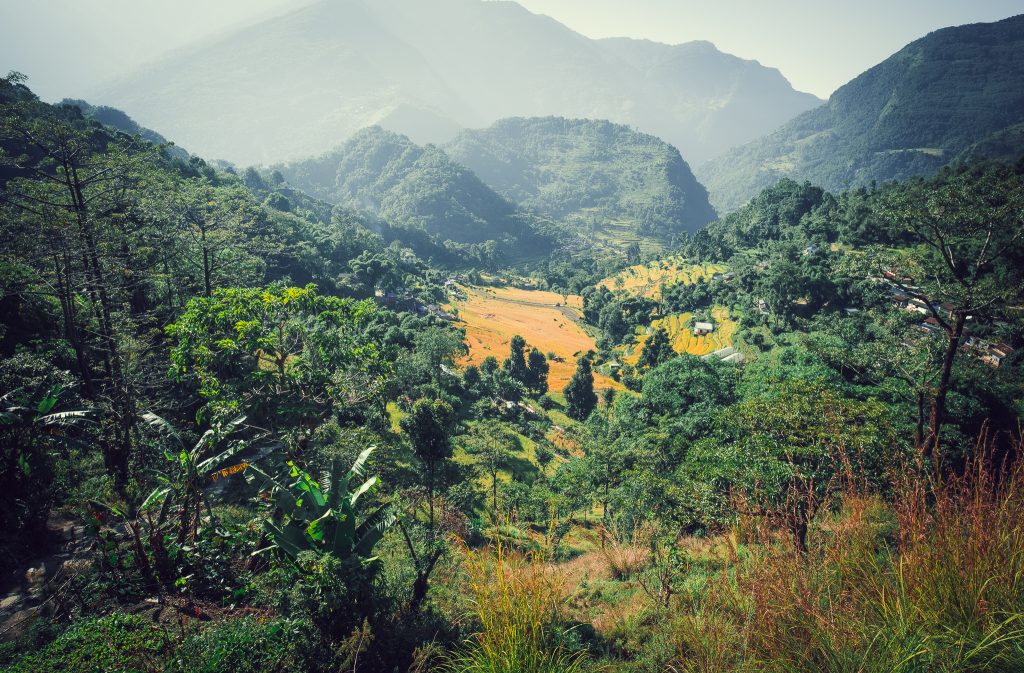
Bahundanda
Not far along the trail lies Bahundanda, perched high on a ridge. It offers panoramic views of the valley below and its intricate web of rice terraces. For me, this was the first real highlight of the journey.
As the sun rises or sets, the light dances over the layered fields, offering endless photographic possibilities. It’s a peaceful place to pause, soak in the scenery, and appreciate the quiet rhythm of rural life.
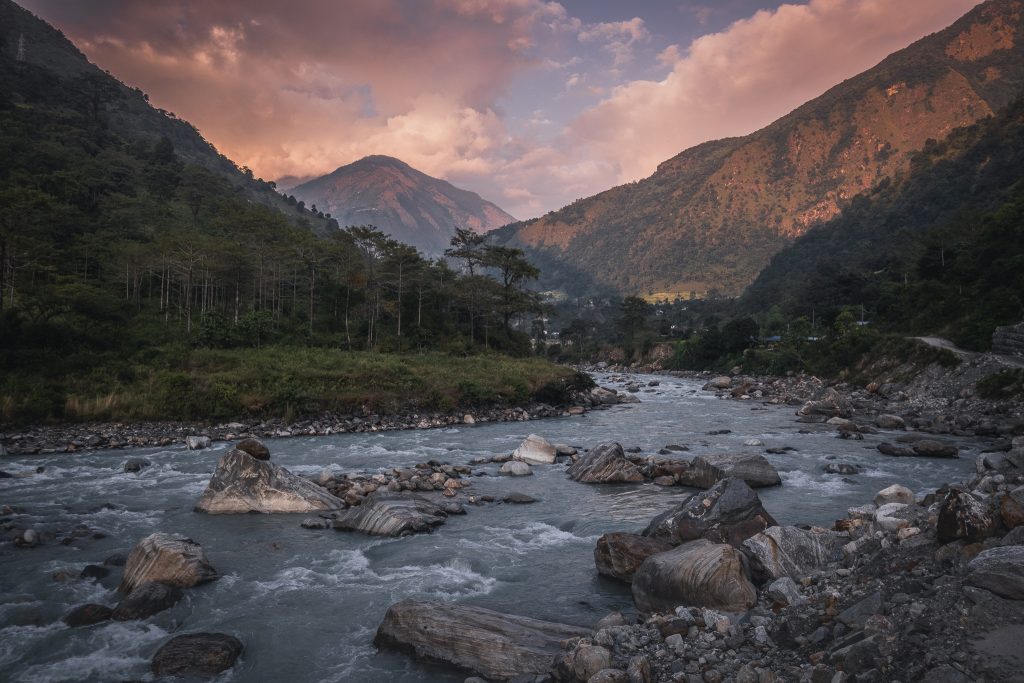
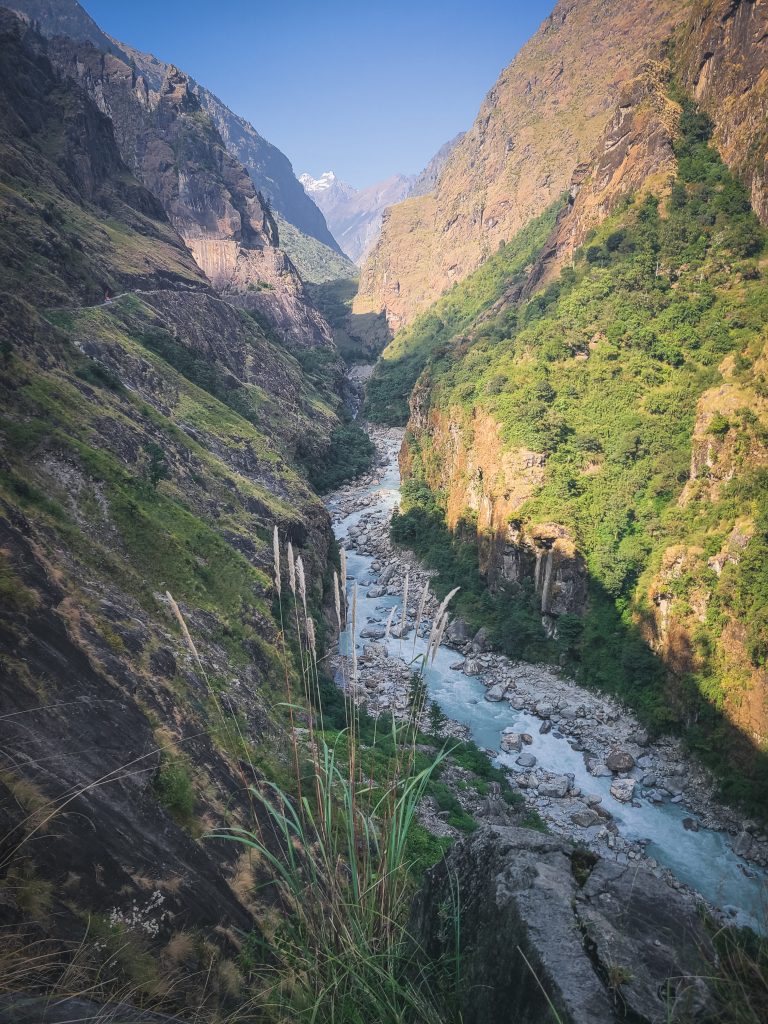
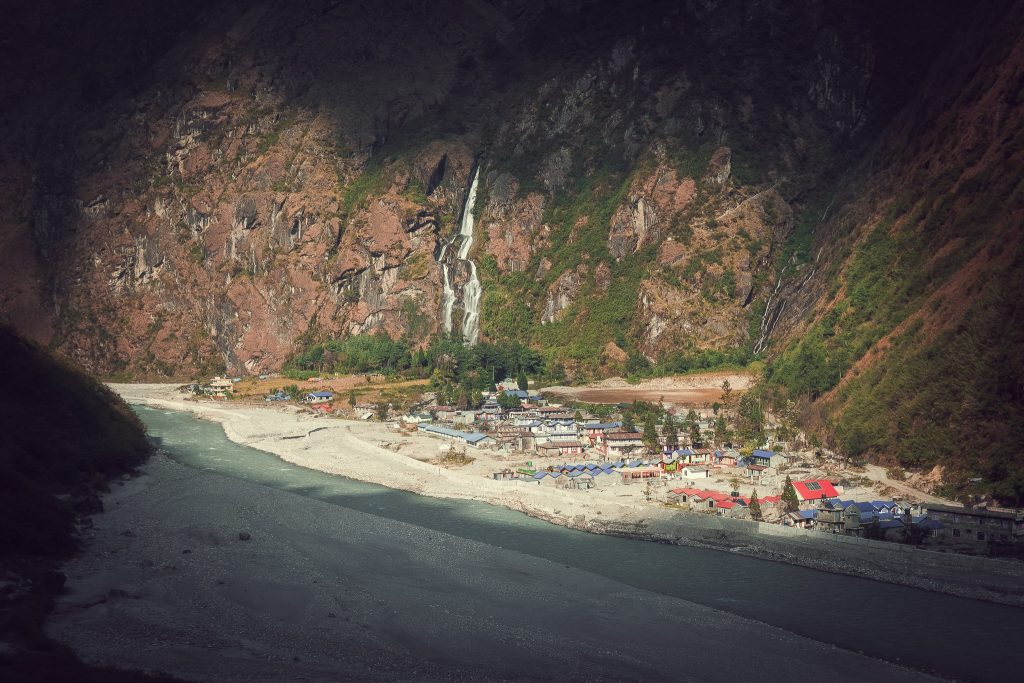
Marsyangdi River Gorge
After Bahundanda, the trail leads you into a dramatically deep canyon carved by the Marsyangdi River. With towering cliffs on either side and the roar of water echoing below, this is one of the more atmospheric parts of the lower trail.
Eventually, you’ll arrive at Tal, a village that, from a distance, looks like something out of a fantasy novel — reminiscent of Rivendell. Tal offers several comfortable accommodation options and is an excellent place to spend the night.
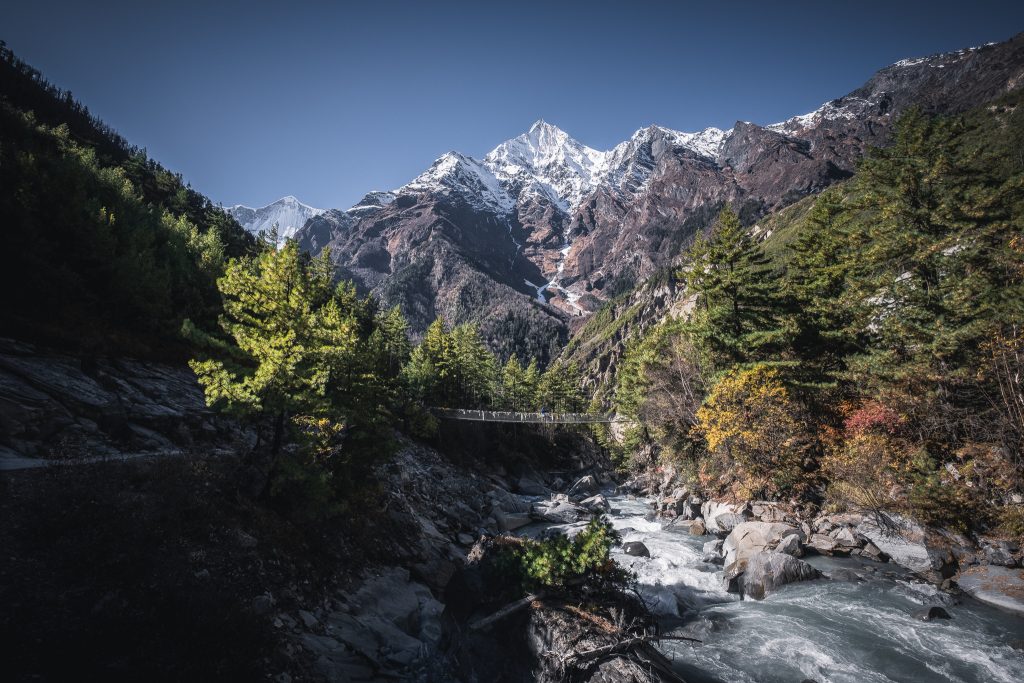
Climbing to Timang
As you ascend toward Timang the following day, you’ll begin to notice the dramatic changes in vegetation and elevation. The forests become thicker and cooler, and the air is noticeably crisper.
On a clear day, you’ll be rewarded with stunning views looking back toward the east, where the mighty Manaslu comes into view. It’s a rewarding climb and offers great opportunities for capturing the first snow covered peaks.
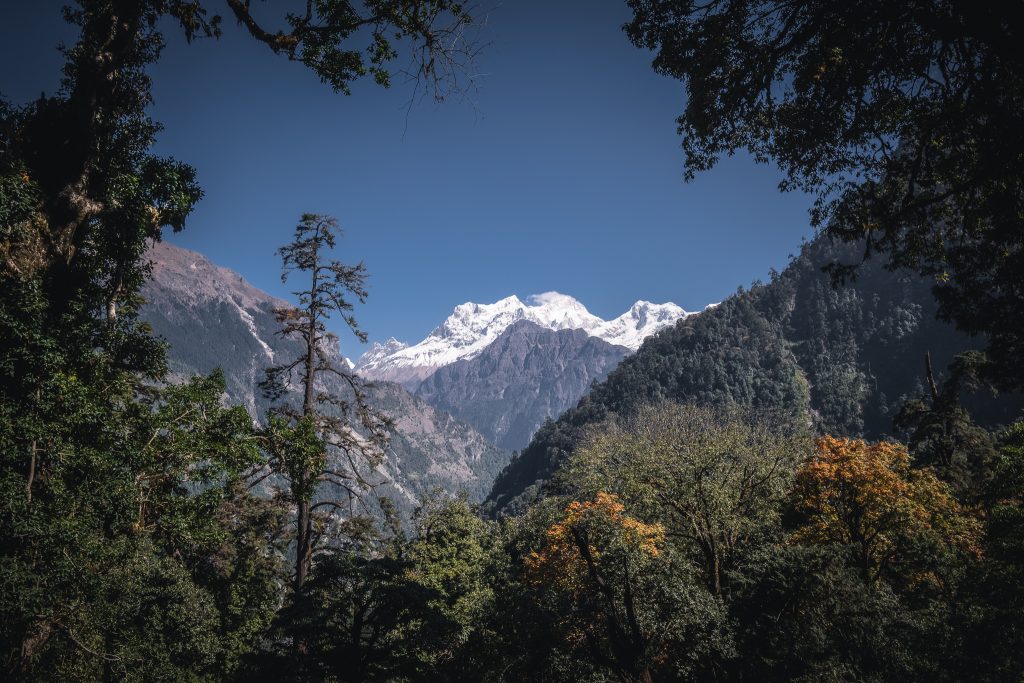
Upper Pisang to Ngawal: A Photographer’s Dream
For me, the most spectacular stretch of the trek began after the trail split from the jeep road. While the main vehicle track continues through Lower Pisang, the trekking path ascends through Upper Pisang. This higher route offers some of the most jaw-dropping views of the Annapurna range.
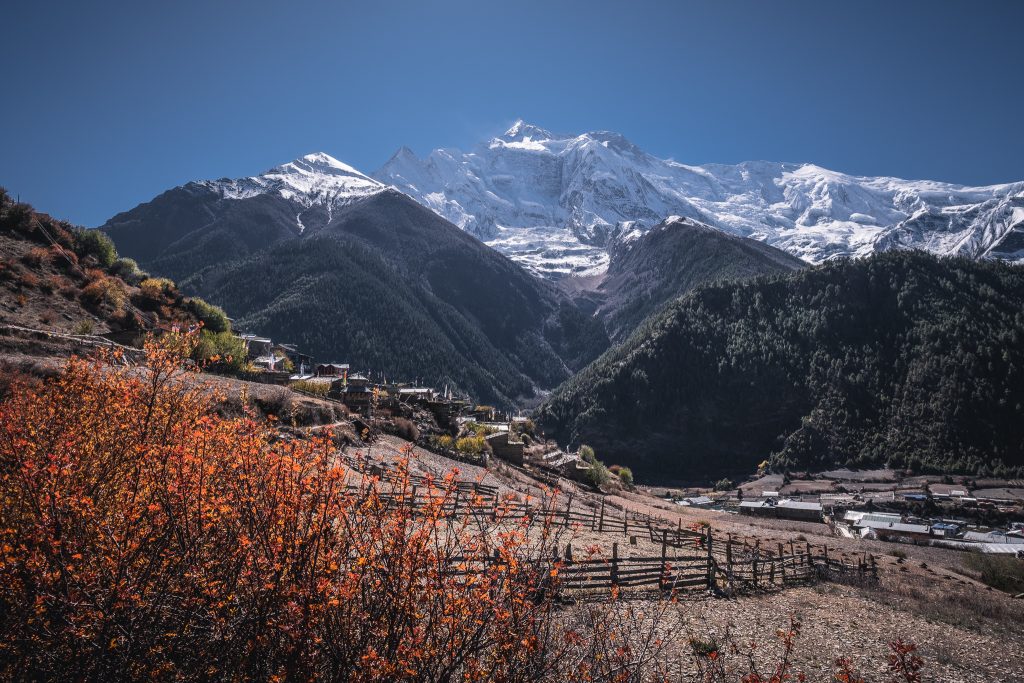
The trail winds through pine forests and high-altitude meadows, opening up to wide panoramas that simply beg to be photographed. After reaching Upper Pisang, a steady climb brings you to Ghyaru, another spectacular viewpoint.
From Ghyaru to Ngawal, the trail continues along the high valley wall. It passes through praying sites, dramatic rock formations, and several spots where the views of the mountains continue to evolve.
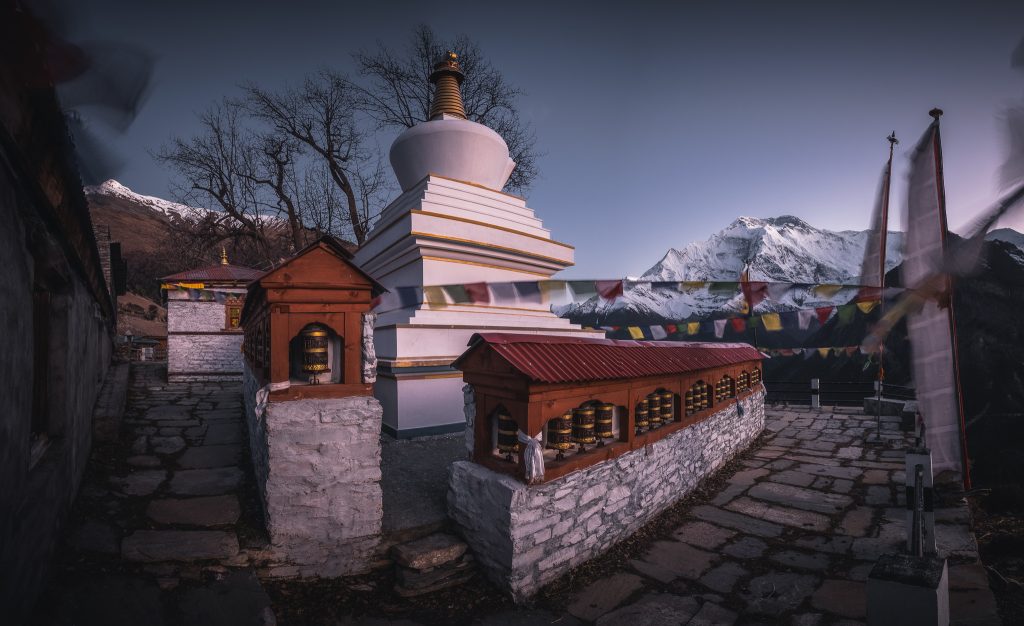
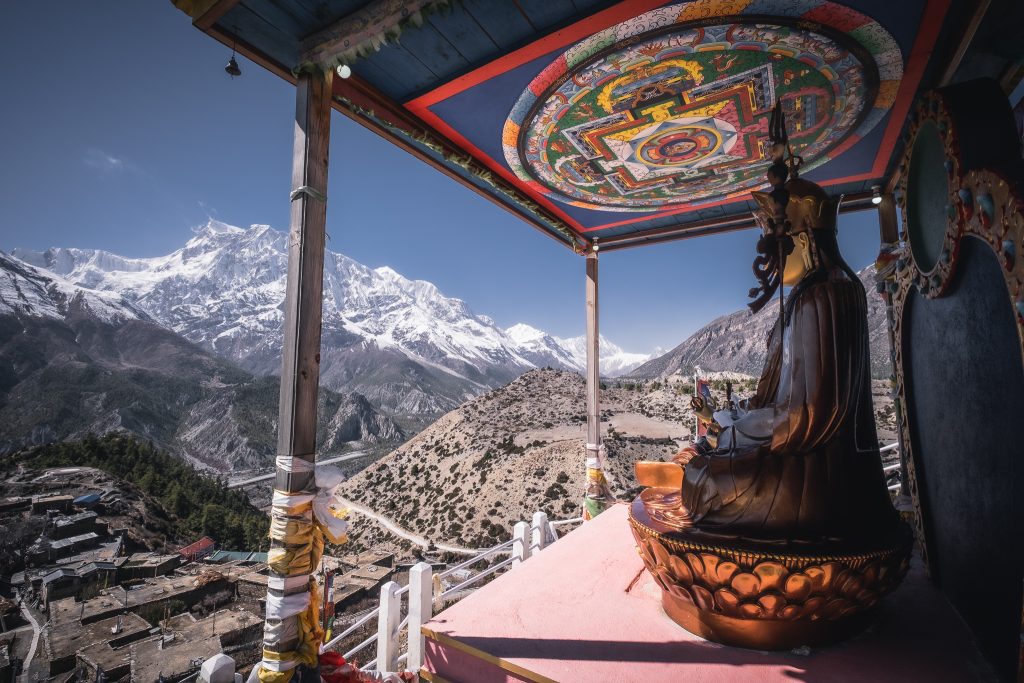
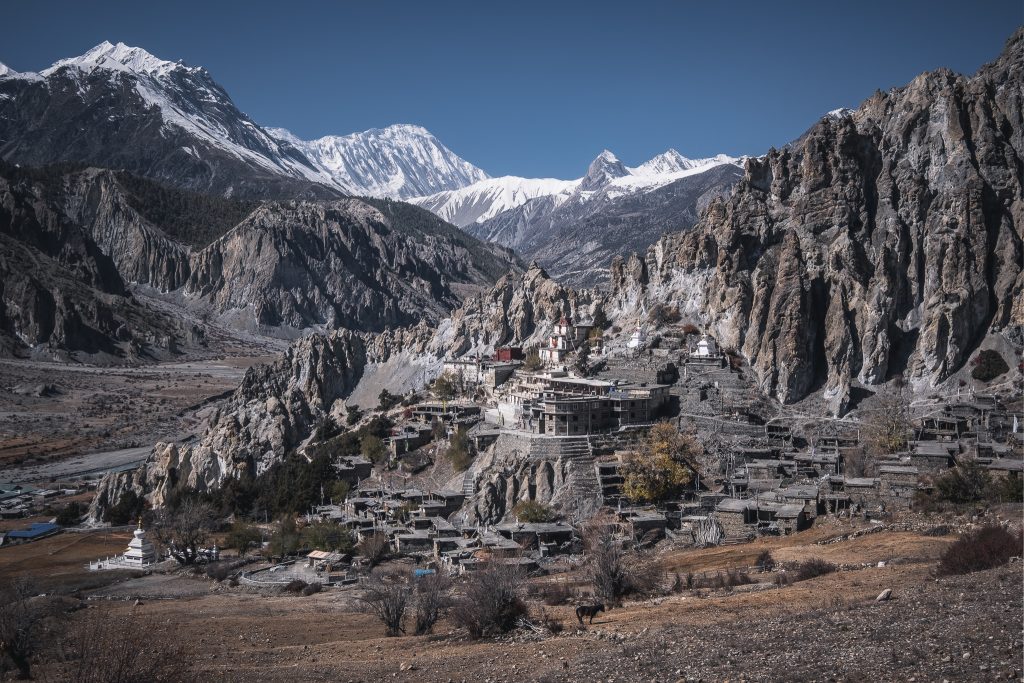
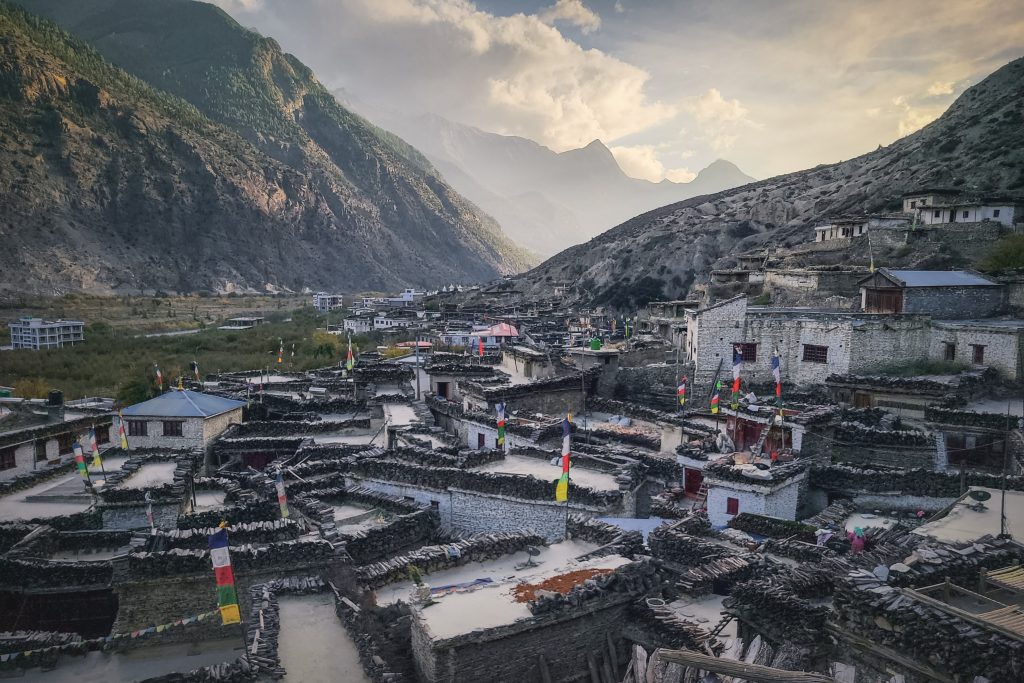
Ngawal itself is a quiet, welcoming village with a number of good lodges. But the real treasure is the monastery on the edge of the village, which offers commanding views of the entire region.

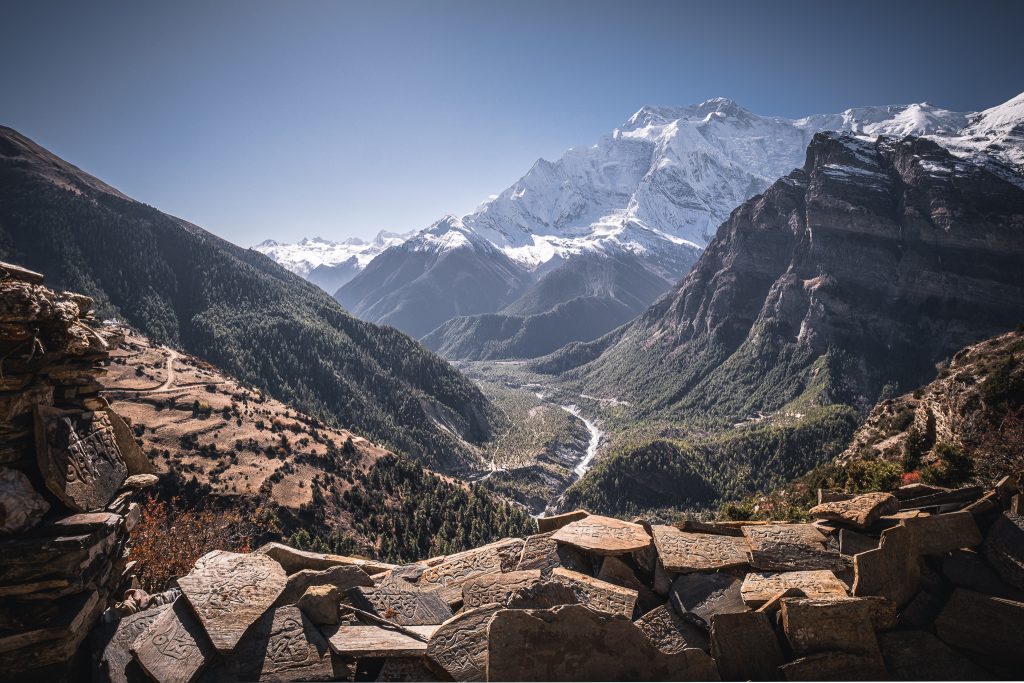
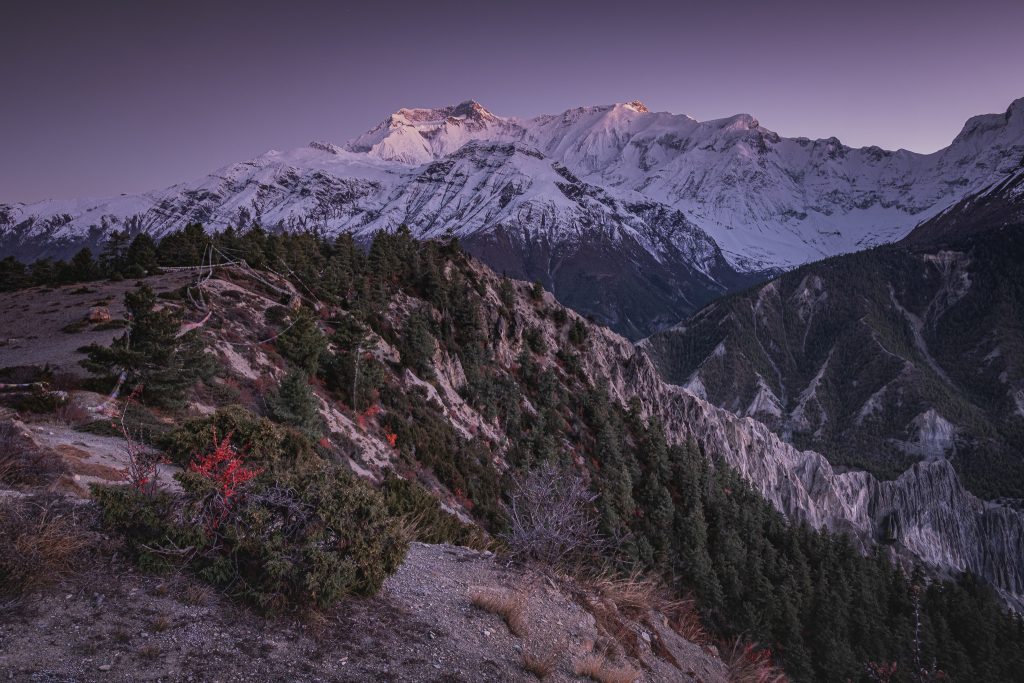
Chulu Ridge
Rather than descending to the valley with the main trail, we chose to stay high by continuing through Chulu. This alternative path remains hundreds of meters above the valley and provides even better views of the surrounding peaks.
If you’re equipped with a tent, as we were, this route allows for an unforgettable wild camping experience. Spending a night above the valley rewards you with stunning vistas and great photographic opportunity both in the evening and morning the next day.

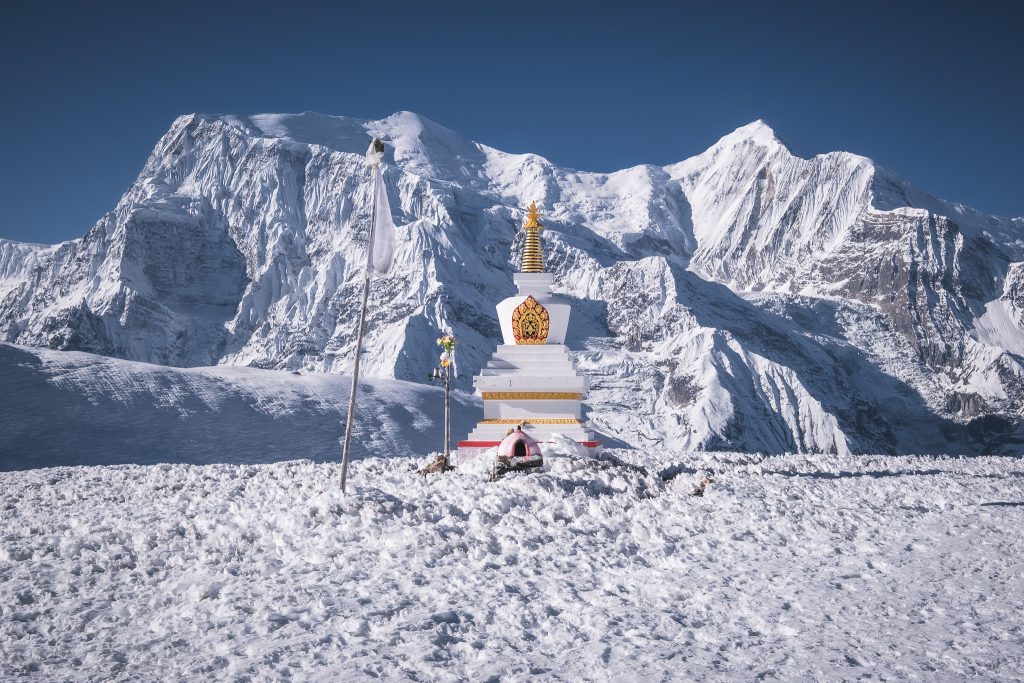
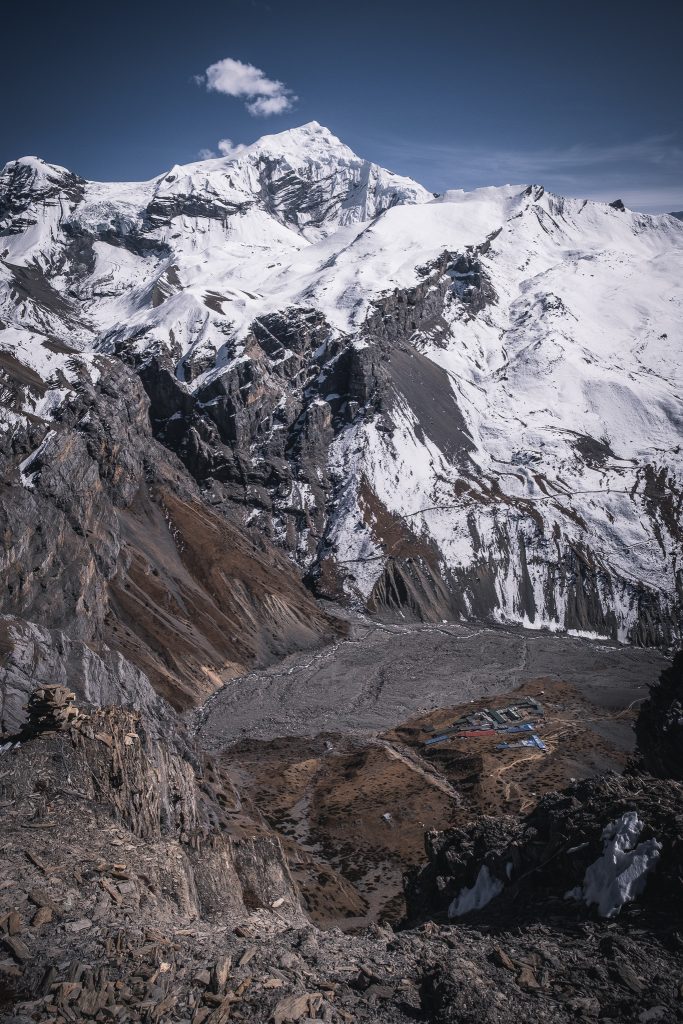
Ice Lake (Kicho Tal)
A classic acclimatization hike, the trail to Kicho Tal (Ice Lake) takes you up to 4,600 meters. While it’s a strenuous climb, it’s one of the most scenic parts of the entire circuit.
Due to its location and elevation, the lighting at sunrise and sunset is especially beautiful. Spending a night there is tempting for any landscape photographer — but make sure you’re well-acclimatized before attempting it. And ready for a cold night!
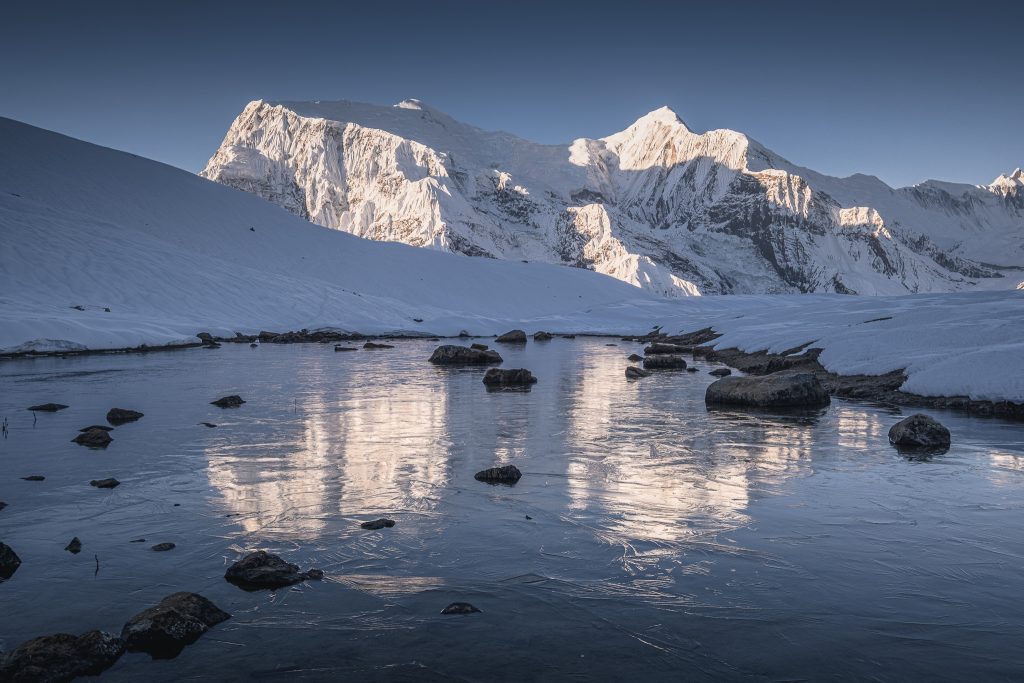

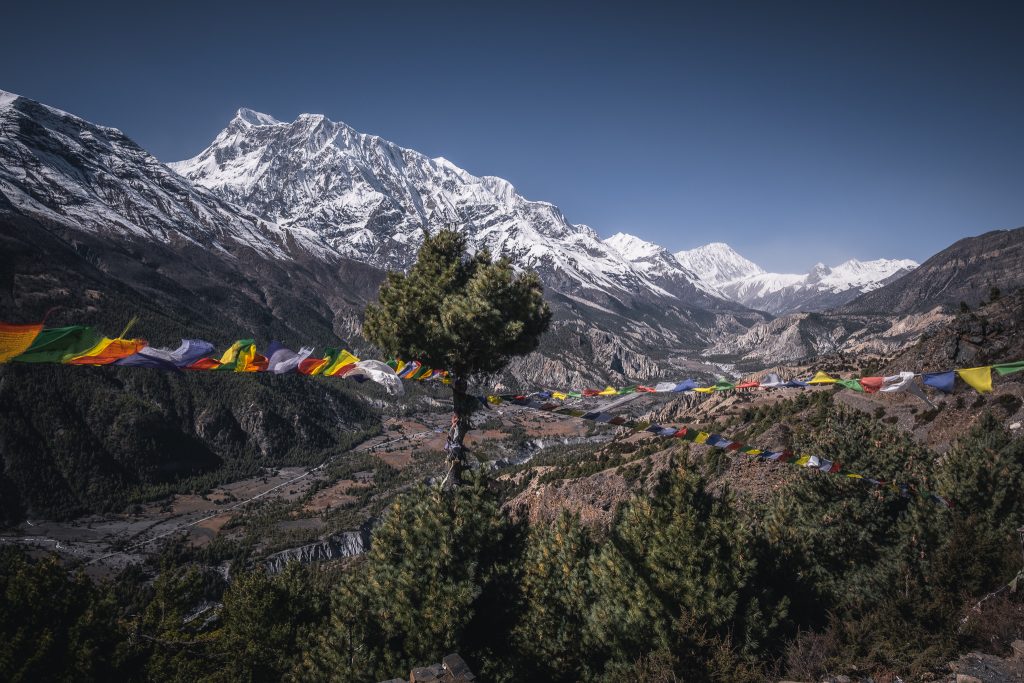
Manang
Descending back to the valley, Manang provides a comfortable place to rest. It has a wide variety of lodges and shops for supplies. A short but scenic side-trip from town leads to a viewpoint above Gangapurna Lake, where turquoise waters contrast with snowy peaks and hanging glaciers.
Tilicho Lake
From Manang, many trekkers make a side trip to Tilicho Lake, the highest large lake in the world. Though I didn’t do this part myself, I’ve seen enough photos to know it’s a place of unmatched alpine beauty. If you have the time and are well-acclimatized, spending a night there would be incredible — both for photography and the experience.
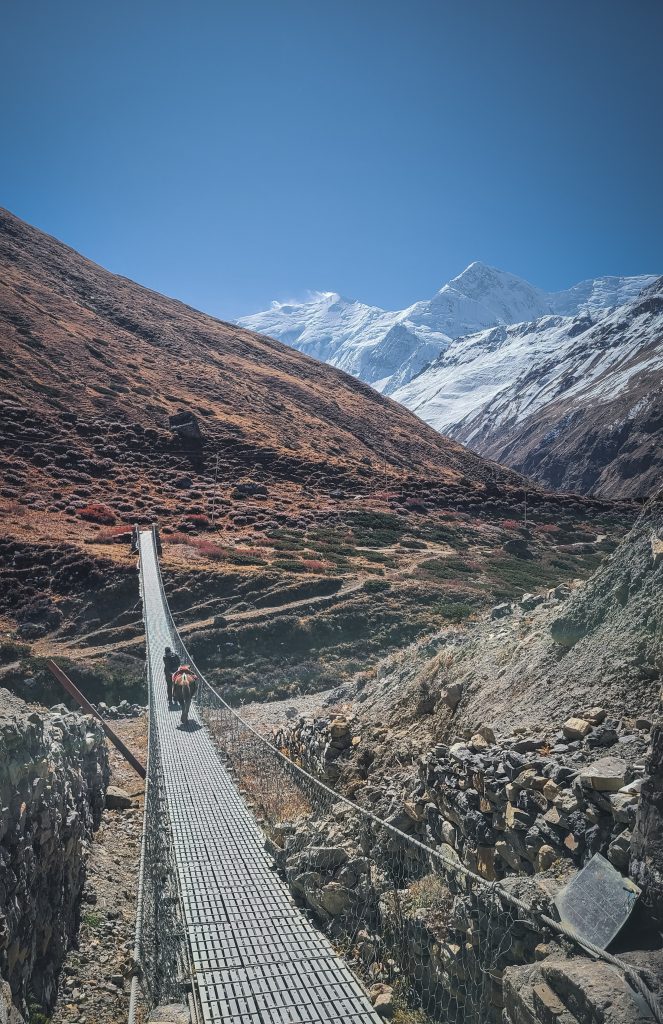
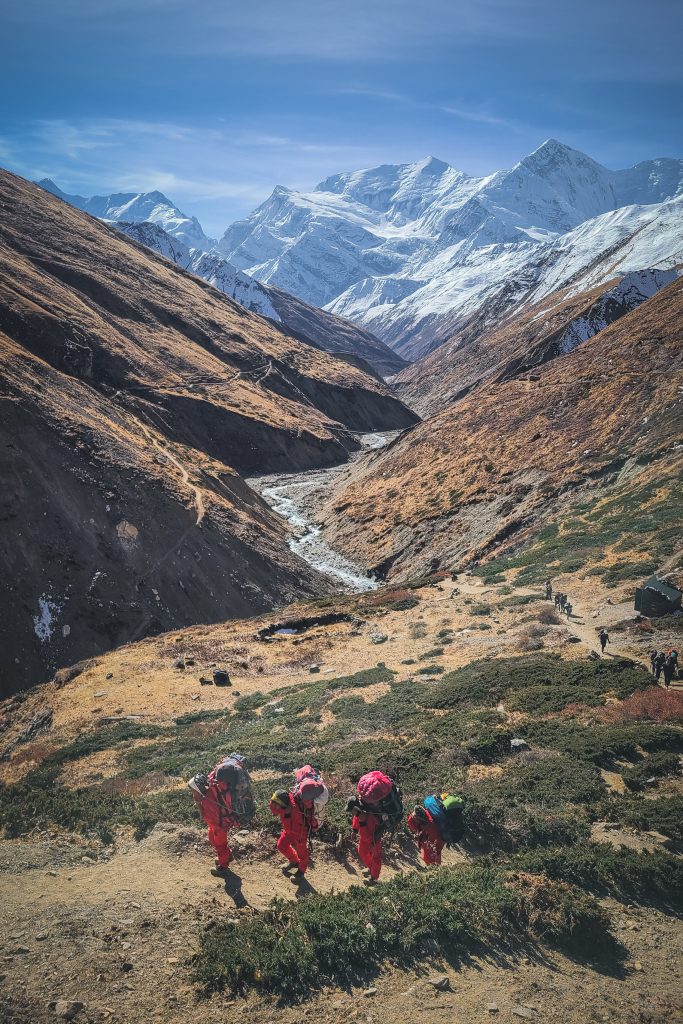
Toward Thorong La
As you continue toward Thorong La, the trail becomes more barren and stark. You’ll have fewer direct views of the Annapurna range, but the high-altitude landscape remains striking.
There are noticeably more people on the trail after Manang, as everyone follows the same route and many who arrive by jeep also join the trek at this point. That said, it never felt uncomfortably crowded to me.
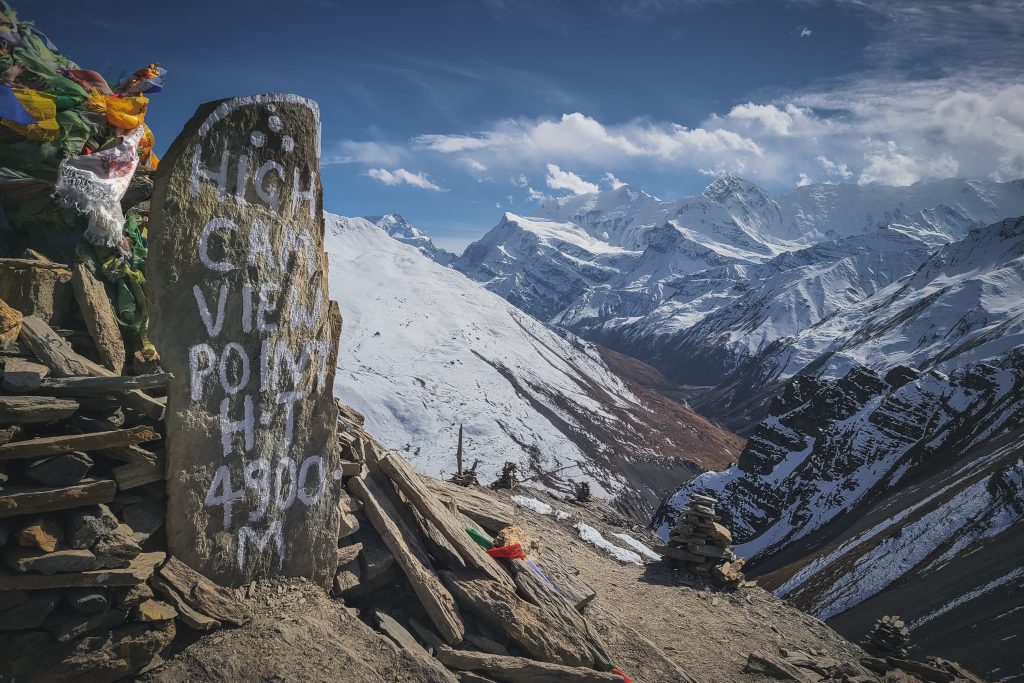
The best views come just above High Camp, a spot that typically marks the end of this segment’s major photographic opportunities before crossing the pass.
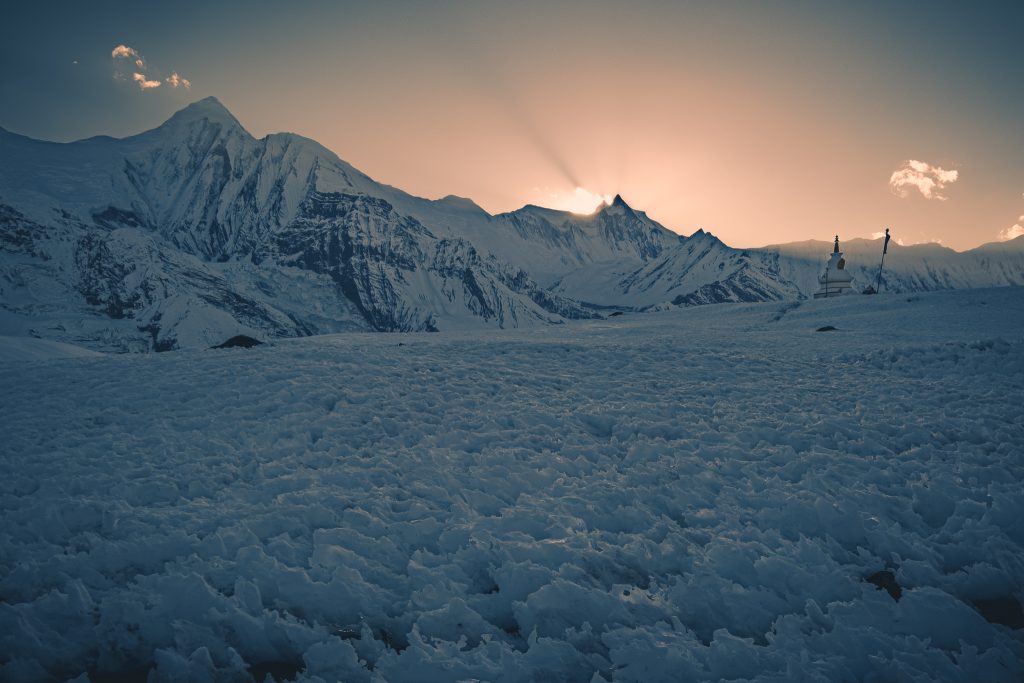
Crossing Into Mustang
Crossing Thorong La is a major milestone, and on the other side lies a completely different world. The arid, rugged beauty of Mustang unfolds slowly as you descend.
After reaching Muktinath and Ranipauwa, many trekkers end their journey and take a jeep or flight from Jomsom. In my opinion, that’s unfortunate. The circuit still has a lot to offer beyond this point.
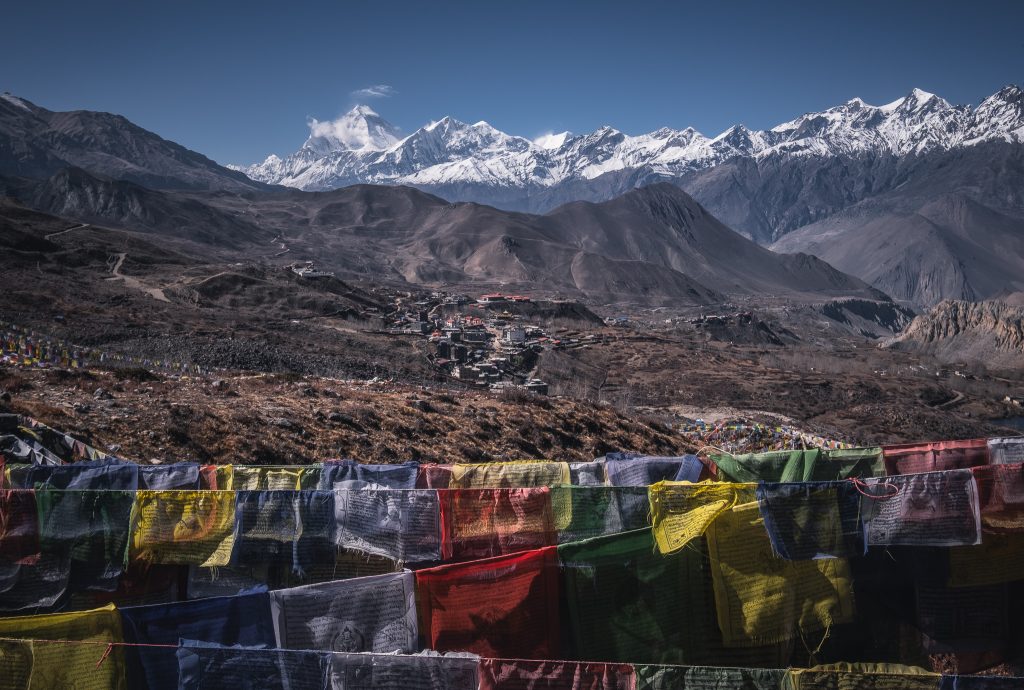
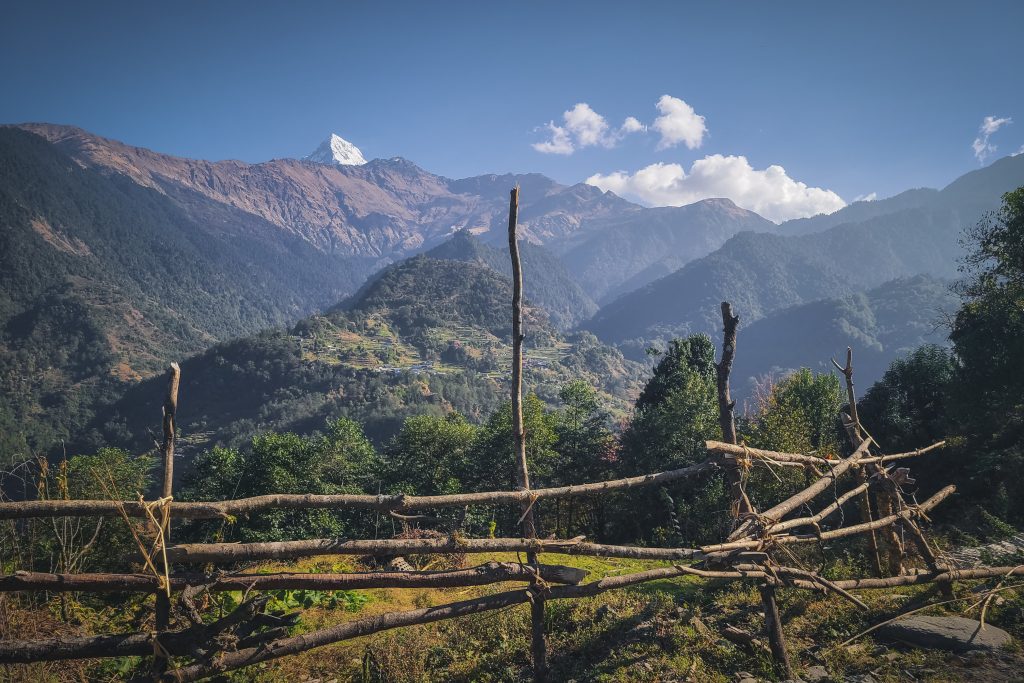
If you cross the Jhong Khola river at Muktinath and continue on its northern side, you’ll be treated to stunning views — not only looking back toward the Annapurnas, but forward toward the majestic Dhaulagiri, one of the world’s 8,000-meter peaks.
Road Section and Marpha Monastery
The section after Jomsom is somewhat different due to the fact that there’s a road through the valley, where even buses drive and so it’s no longer a wilderness. It’s still possible to continue walking, but we decided to skip the part until Pokharebagar.
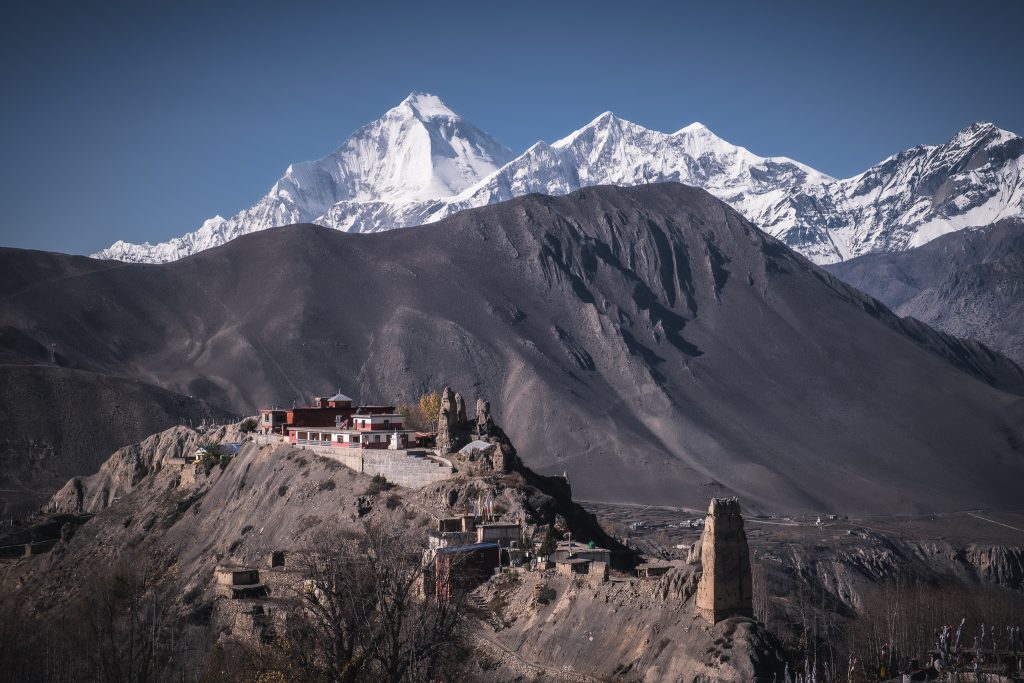
One exception was Marpha, known for its picturesque monastery and tidy stone alleyways. It’s a lovely stop but feels more like a bustling town than the tranquil villages earlier on the trek.
Ghorepani
From Pokharebagar, the trail climbs again, leaving the road behind. The scenery becomes wild once more, and views back toward Dhaulagiri are excellent.
Eventually, you reach Ghorepani, a major trekking hub with significantly more foot traffic. While more crowded, it’s worth visiting for the incredible views.
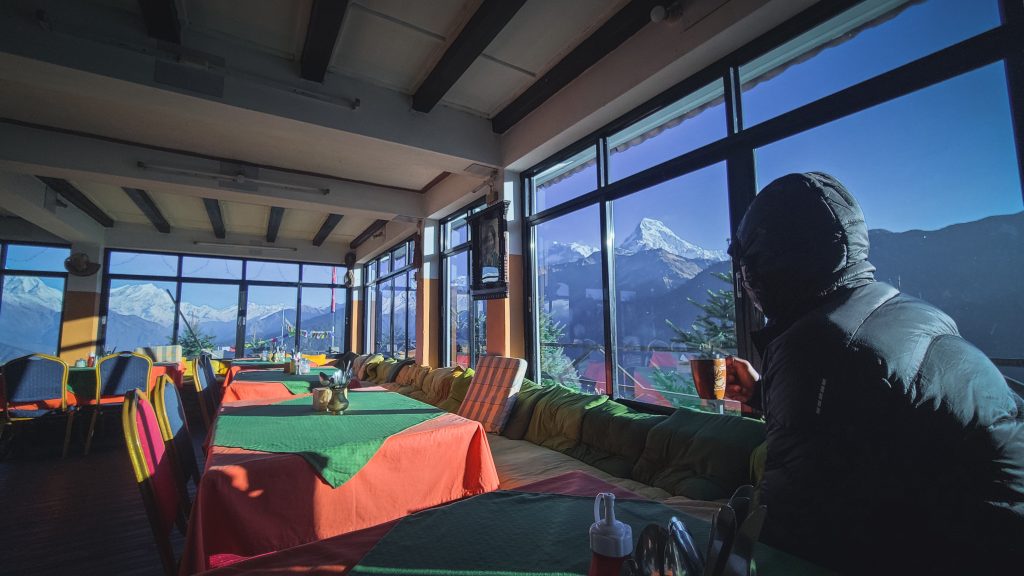
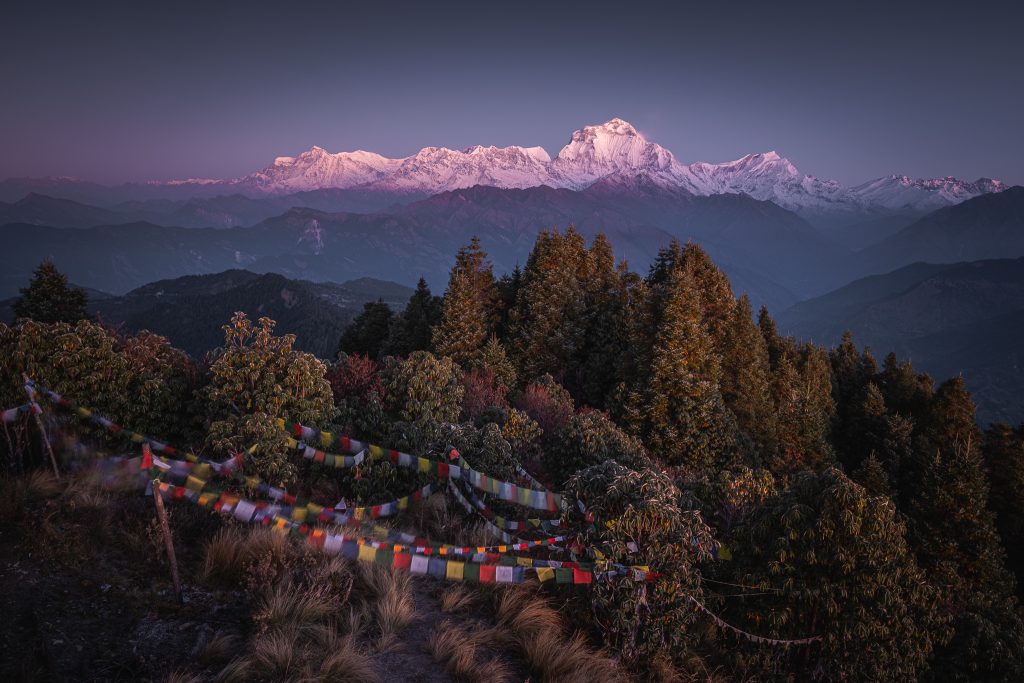
Poon Hill
Poon Hill is famous for its sunrise views of the Annapurna and Daughaliri ranges. However, if you’re hoping for solitude, be prepared — hundreds of people can gather here early in the morning. Despite the crowds, the sunrise over the mountains is spectacular and well worth the effort.
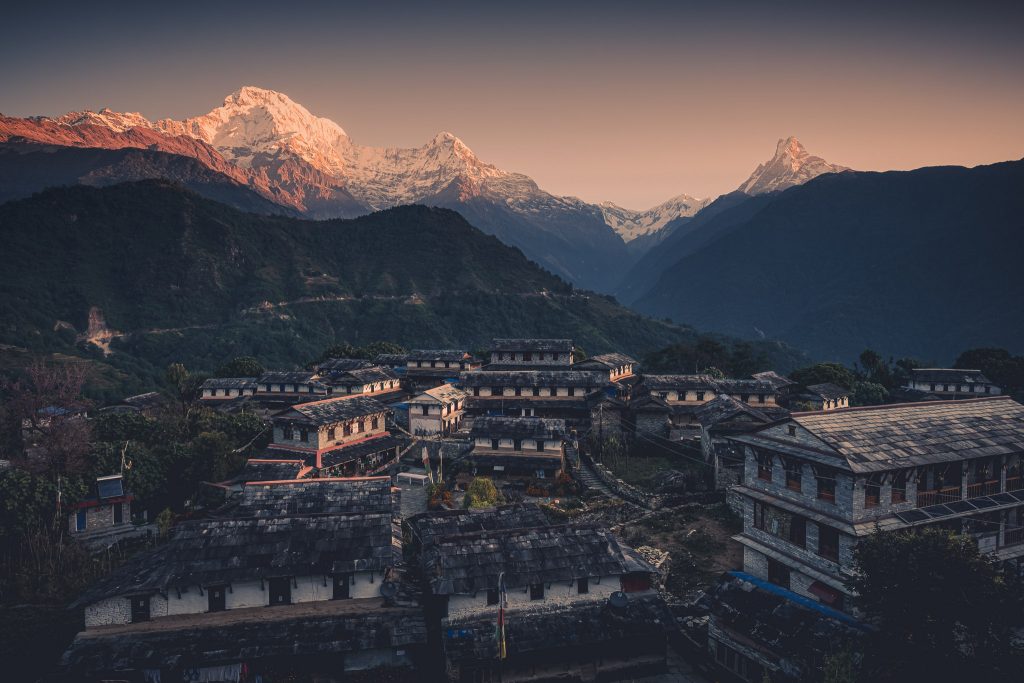
Ghandruk
Rather than heading straight down to Birethanti, we extended the trek by going through Ghandruk. This detour adds another day but is incredibly rewarding.
The trail to Ghandruk offers many more views of the Annapurna range, and the old part of the village (Purano Ghandruk) provides a perfect foreground for dramatic landscape shots.
From there, the final descent to Birethanti is straightforward. Once there, you can catch a taxi back to Pokhara.
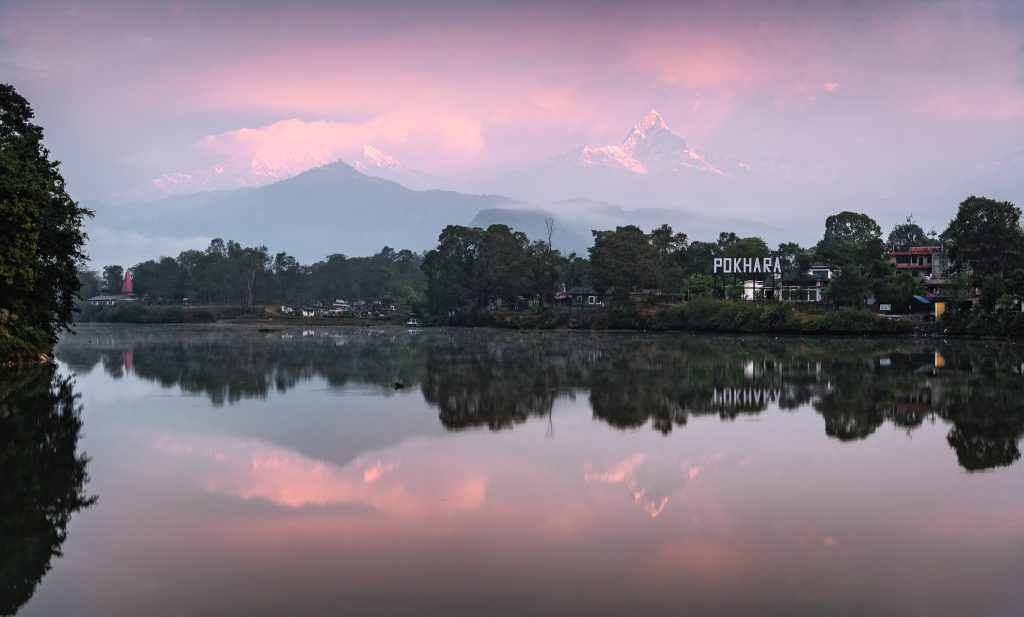
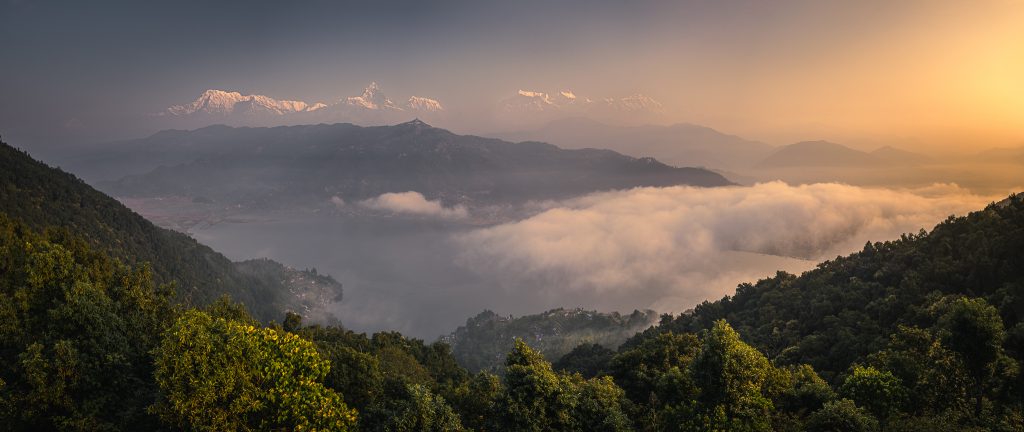
Pokhara
Though not technically part of the circuit, Pokhara is often the starting or ending point for Annapurna treks. It’s a relaxing lakeside town with its own share of photogenic moments.
From the southern shores of Phewa Lake, you’ll get excellent views of the Annapurna range, especially the striking and sacred Machapuchare (Fish Tail) — a mountain that always seems to steal the show.
Conclusion
The Annapurna Circuit is a treasure trove for photographers. While it may not have as many isolated, towering peaks as the Everest region, the diversity of landscapes is unmatched. From rice terraces and pine forests to glacial lakes and high desert, every day offers something new.
If you’re passionate about landscape photography, trekking, and experiencing one of the most scenic trails on earth — you absolutely won’t regret taking the time to walk the full circuit.
When to Go
Nepal has two main trekking seasons: Spring and Autumn. Spring brings warmer temperatures but also a higher chance of clouds and precipitation. Autumn, on the other hand, usually offers clear skies and more stable weather.
For photography, Autumn is generally the better choice, as the mountain views are more consistent and rarely obscured by clouds. That said, Spring can offer more dramatic lighting conditions, which might add extra character to your shots.
In the end, it depends on what you’re looking for—clear, reliable views or moodier, more dynamic scenes. The choice is yours.
Photography Gear
Tea house treks in Nepal don’t require you to carry a lot. With smart packing, a small backpack is usually enough—which means you can dedicate more space to your photography gear, if you choose to bring it.
For serious photography, a tripod is essential, especially for low-light scenes and mountain sunrises. I used a Fujifilm X-T3, though the newer X-T5 would be a great choice too.
In terms of lenses, I recommend bringing a wide-angle lens like the XF 10-24mm, and a standard zoom such as the XF 18-55mm. I didn’t use a telephoto lens much, but there are definitely moments—especially with distant peaks or wildlife—where it could come in handy.
If you prefer to travel light and focus more on the trekking experience and scenery, a good mobile phone camera can be more than enough. In fact, several photos in this article were taken with an older Samsung Galaxy S20. On a more recent trek, I tested the Google Pixel 9 Pro and found it to be a very capable photography tool. (You can read more about that in a separate article.)